前端实现滑动按钮AJAX与后端交互的代码怎么写
短信预约 -IT技能 免费直播动态提醒
这篇“前端实现滑动按钮AJAX与后端交互的代码怎么写”文章的知识点大部分人都不太理解,所以小编给大家总结了以下内容,内容详细,步骤清晰,具有一定的借鉴价值,希望大家阅读完这篇文章能有所收获,下面我们一起来看看这篇“前端实现滑动按钮AJAX与后端交互的代码怎么写”文章吧。
html代码
<div class="switch-box"> <input id="switchButton" type="checkbox" class="switch" /> <label for="switchButton"></label></div>css代码
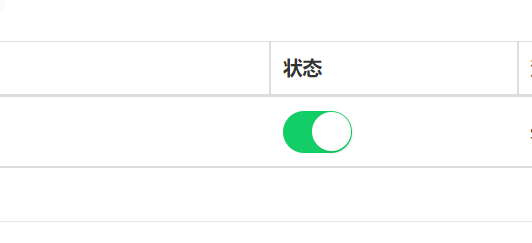
.switch-box { width: 48px;}.switch-box .switch { display: none;}.switch-box label { position: relative; display: block; margin: 1px; height: 28px; cursor: pointer;}.switch-box label::before { content: ''; position: absolute; top: 50%; left: 50%; margin-top: -13px; margin-left: -14px; width: 26px; height: 26px; border-radius: 100%; background-color: #fff; box-shadow: 1px 1px 1px 1px rgba(0, 0, 0, 0.06); -webkit-transform: translateX(-9px); -moz-transform: translateX(-9px); transform: translateX(-9px); -webkit-transition: all 0.3s ease; -moz-transition: all 0.3s ease; transition: all 0.3s ease;}.switch-box .switch:checked~label::before { -webkit-transform: translateX(10px); -moz-transform: translateX(10px); transform: translateX(10px);}.switch-box label::after { content: ""; display: block; border-radius: 30px; height: 28px; background-color: #dcdfe6; -webkit-transition: all 0.3s ease; -moz-transition: all 0.3s ease; transition: all 0.3s ease;}.switch-box .switch:checked~label::after { background-color: #13ce66;}效果图
效果如图:

JS事件触发
<input id="switchButton" type="checkbox" class="switch" onclick="reverseStatus('1')" />input添加onclick事件,点击触发reverseStatus()函数
<script>function reverseStatus(id){$.get("/pocs/reverse/"+id);}</script>flask后端接口
@poc.route('/pocs/reverse/<int:id>', methods=['GET'])def reverse(id=None): print(id) return 'success'在后端编写我们需要的逻辑
以上就是关于“前端实现滑动按钮AJAX与后端交互的代码怎么写”这篇文章的内容,相信大家都有了一定的了解,希望小编分享的内容对大家有帮助,若想了解更多相关的知识内容,请关注编程网行业资讯频道。
免责声明:
① 本站未注明“稿件来源”的信息均来自网络整理。其文字、图片和音视频稿件的所属权归原作者所有。本站收集整理出于非商业性的教育和科研之目的,并不意味着本站赞同其观点或证实其内容的真实性。仅作为临时的测试数据,供内部测试之用。本站并未授权任何人以任何方式主动获取本站任何信息。
② 本站未注明“稿件来源”的临时测试数据将在测试完成后最终做删除处理。有问题或投稿请发送至: 邮箱/279061341@qq.com QQ/279061341


