使用css3怎么实现一个宠物小鸡
今天就跟大家聊聊有关使用css3怎么实现一个宠物小鸡,可能很多人都不太了解,为了让大家更加了解,小编给大家总结了以下内容,希望大家根据这篇文章可以有所收获。
<body> <div class="content"> <!-- 天上的云 --> <div class="cloud"> <div class="content"></div> </div> <!--鸡冠--> <div class="crest"></div> <!--翅膀--> <div class="hand"></div> <!-- 宠物小鸡body --> <div class="egg"> <!--眼睛--> <div class="eye"></div> <!--腮红--> <div class="blush"></div> <!--嘴--> <div class="mouth"></div> <!--脚--> <div class="feet"></div> </div> </div></body>接下来是css设置样式:
先设置整体的背景色,使用的是线性渐变linear-gradient,设置蓝天色和草地色,并设置让元素居中。
.content { width: 100%; height: 800px; background: linear-gradient(rgb(170, 227, 253) 60%, rgb(149, 219, 126) 80px); display: flex; justify-content: center; align-items: center; }天上的云:先给一定的宽高和背景色,使用border-radius设置边框圆角效果,只设置左上和右上。效果如下:
border-radius: 100% 100% 0 0;

在使用::before和::after伪元素画出一朵完整的云:
.content::before, .content::after { content: ''; position: absolute; bottom: 0; } .content::before { width: 40px; height: 40px; background: currentColor; left: -20px; border-radius: 100% 100% 0 100%; } .content::after { width: 35px; height: 30px; background: currentColor; right: -20px; border-radius: 100% 100% 100% 0; }然后使用阴影在画出两朵云

.content,.content::before,.content::after { box-shadow: -200px 50px 0 -5px rgb(191, 232, 252), 200px 60px 0 10px rgb(191, 233, 253); }
云朵实现了。
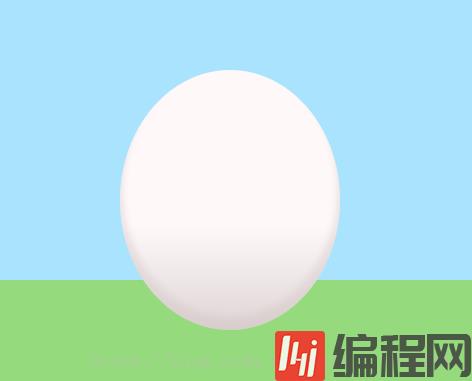
接下来是宠物小鸡,先把身体写出来,同样用border-radius设置边框圆角效果,画出鸡蛋的模样,设置背景色,并使用box-shadow设置向内的阴影。
.egg { width: 220px; height: 260px; border-radius: 100%; background: linear-gradient(rgb(254, 249, 249) 60%,rgb(221, 213, 213)); position: absolute; display: flex; flex-direction: column; align-items: center; box-shadow: 0 -10px 10px 3px rgba(211, 194, 194,0.4) inset;}
鸡冠和云朵的写法差不多
.crest { position: relative; top: -17%; width: 30px; height: 25px; background: rgb(233, 19, 19); border-radius: 50% 100% 20% 20%; } .crest::before, .crest::after { content: ''; position: absolute; bottom: 0; width: 20px; background: rgb(233, 19, 19); } .crest::before { left: -5px; height: 20px; border-radius: 100% 50% 0 20%; } .crest::after { right: -15px; height: 15px; background: rgb(233, 19, 19); border-radius: 20% 200% 20% 30%; }眼睛,翅膀,腮红,分别用伪元素左右定位设置大小即可实现。嘴部使用transform旋转45°并使用线性渐变设置鸡嘴的阴影效果。
全部css代码如下(我安装了sass插件,所以是scss的写法):
body { margin: 0; width: 100%; height: 100%; >.content { width: 100%; height: 800px; background: linear-gradient(rgb(170, 227, 253) 60%, rgb(149, 219, 126) 80px); display: flex; justify-content: center; align-items: center; >.cloud { position: absolute; top: 5%; color: rgb(216, 242, 254); >.content { width: 50px; height: 50px; background: currentColor; border-radius: 100% 100% 0 0; } >.content::before, >.content::after { content: ''; position: absolute; bottom: 0; } >.content::before { width: 40px; height: 40px; background: currentColor; left: -20px; border-radius: 100% 100% 0 100%; } >.content::after { width: 35px; height: 30px; background: currentColor; right: -20px; border-radius: 100% 100% 100% 0; } >.content, .content::before, .content::after { box-shadow: -200px 50px 0 -5px rgb(191, 232, 252), 200px 60px 0 10px rgb(191, 233, 253); } } >.egg { width: 220px; height: 260px; border-radius: 100%; background: linear-gradient(rgb(254, 249, 249) 60%,rgb(221, 213, 213)); position: absolute; display: flex; flex-direction: column; align-items: center; box-shadow: 0 -10px 10px 3px rgba(211, 194, 194,0.4) inset; >.eye::before, .eye::after { content: ''; position: absolute; top: 15%; width: 12px; height: 28px; border-radius: 100%; background: radial-gradient(white 1px, rgb(57, 56, 57) 5%); } > .eye::before{ left: 28%; } >.eye::after { right: 28%; } >.blush::before, .blush::after { content: ''; position: absolute; top: 30%; width: 25px; height: 5px; transform: rotate(0deg); background: rgb(250, 108, 127); border-radius: 100%; box-shadow: 0 0 5px 4px rgb(250, 108, 127); } >.blush::before { left: 20%; } >.blush::after { right: 20%; } >.mouth { position: absolute; top: 32%; width: 20px; height: 20px; background: linear-gradient(135deg, rgb(255, 207, 0) 50%, rgb(224, 184, 2) 50%); transform: rotate(45deg); border-radius: 5% 15%; } > .feet::before, .feet::after{ content: ''; position: absolute; bottom: -12px; width: 10px; height: 15px; border: 7px solid rgb(71, 49, 20); } > .feet::before{ left: 60px; border-radius: 80% 100% 100% 50%; transform: rotate(-10deg); border-color: transparent transparent transparent rgb(71, 49, 20); } > .feet::after{ right: 60px; border-radius: 100% 80% 50% 0%; transform: rotate(10deg); border-color: transparent rgb(71, 49, 20) transparent transparent ; } } >.crest { position: relative; top: -17%; width: 30px; height: 25px; background: rgb(233, 19, 19); border-radius: 50% 100% 20% 20%; } >.crest::before, .crest::after { content: ''; position: absolute; bottom: 0; width: 20px; background: rgb(233, 19, 19); } >.crest::before { left: -5px; height: 20px; border-radius: 100% 50% 0 20%; } >.crest::after { right: -15px; height: 15px; background: rgb(233, 19, 19); border-radius: 20% 200% 20% 30%; } > .hand{ position: relative; top: -5%; } > .hand::before, .hand::after{ content: ''; position: absolute; } > .hand::before{ left:-135px; width: 20px; height: 80px; transform: rotate(15deg); background: rgb(250, 242, 242); border-radius: 100% 0 50% 50%; } > .hand::after{ right: -110px; width: 20px; height: 80px; transform: rotate(-15deg); background: rgb(250,242,242); border-radius: 50% 100% 50% 50%; } }}看完上述内容,你们对使用css3怎么实现一个宠物小鸡有进一步的了解吗?如果还想了解更多知识或者相关内容,请关注编程网行业资讯频道,感谢大家的支持。
免责声明:
① 本站未注明“稿件来源”的信息均来自网络整理。其文字、图片和音视频稿件的所属权归原作者所有。本站收集整理出于非商业性的教育和科研之目的,并不意味着本站赞同其观点或证实其内容的真实性。仅作为临时的测试数据,供内部测试之用。本站并未授权任何人以任何方式主动获取本站任何信息。
② 本站未注明“稿件来源”的临时测试数据将在测试完成后最终做删除处理。有问题或投稿请发送至: 邮箱/279061341@qq.com QQ/279061341

